For a recent project, I needed to add cellular connectivity to a Raspberry Pi (actually, an entire cluster... but that's a story for a future time!).

I figured I'd document the process in this blog post so people who follow in my footsteps don't need to spend quite as much time researching. This post is the culmination of 40+ hours of reading, testing, and head-scratching.
There doesn't seem to be any good central resource for "4G LTE and Linux" out there, just a thousand posts about the ABC's of getting an Internet connection working through a 4G modemâbut with precious little explanation about why or how it works. (Or why someone should care about random terms like PPP, ECM, QMI, or MBIM, or why someone would choose
qmi_wwan
over
cdc_ether
, or ... I could go on).
Hopefully you can learn something from my notes. Or point out places where I'm glaringly wrong :)
Hardware
The hardware requirements are not too bad, and remarkably affordable. You'll need:
- A Raspberry Pi (almost any will do, though I used a Raspberry Pi 4 (with a USB adapter) and a Compute Module 4 (with a carrier board with a mini PCIe slot).
- A mini PCI Express 4G LTE modem. I used a Quectel EC25-A , but there are some from Sierra Wireless I've heard recommended too.
- (If not using a CM4 + LTE carrier board) A USB to mini PCIe adapter with built-in SIM tray. I used this one from Timack but any should doâjust make sure it has a SIM try built-in! There are even Pi HATs like this one that place the modem hardware directly atop the Pi.
- A SIM card with a 4G data plan. I bought a SixFab SIM and used their monthly pay-as-you-go service for testing. You could pull out the SIM from your mobile phone (on most carriers at least) but that is a bit inconvenient as your phone won't get service until you put the SIM back in. You could also get a plan and SIM from any major carrier (e.g. AT&T, T-Mobile, Verizon in the USA)âthough you have to make sure the carrier you use works with the LTE modem you have!
- An antennaâmost modems have plugs for LTE main, LTE diversity, and GPS/GNSS. I typically use this Pulse Electronics U.FL antenna in a pinch, but there are many options for different needs (e.g. outdoor antennas, antennas with longer cables and SMA to U.FL adapters )âyou have to figure out exactly what you need depending on your environment.
- (Depending on the SIM) If you want to use the SIM from your phoneâwhich might be a nano SIMâyou should also have on hand a cheap SIM Adapter set like the one I use .
To save on cost, I bought most of the things I used on eBay, where the price was 30-50% less than buying new on Amazon or SixFab's store. Since there are a lot of enterprise deployments using this type of gear, there's a lot of stock on the used market. Just know that some of it is pretty beat upâso buy only from reputable vendors!
Note: All the instructions in this post assume you're in the US. If you're in another country, some things need changingâfor example, the Quectel modem comes in different varieties for different geographical regions, like the EC25-E for Europe, Africa, and parts of Asia.
Once you have everything together, insert the SIM in the SIM tray on your USB adapter or CM4 carrier board, install the LTE modem in the Mini PCIe slot. If you have a USB adapter, plug that USB adapter into one of the Pi's USB portsâwhich port doesn't really matter since all these devices operate over USB 2.0 (480 Mbps).
Data Plans
Before getting to the setup process, I thought I'd jot down a few notes about data plans, since at least in my part of the USA, it's kinda hard to find generous data packages with features like static IP addresses for a reasonable price.
Just as a point of estimation, it cost me about $30 for 10 GB of data (if pre-purchased), and I can find a few plans that offer 30-50 GB/month for $60-90/month.
I used to have an unlimited plan from AT&T, but they severely throttled data once you went past a certain cap (down to like 100 Kbps, which is excruciating), so I switched to a 30 GB/month shared plan a couple years ago.
I also investigated getting a static public IPv4 address, but that was prohibitively expensive with the carriers I checked on. Instead, you may be able to get a routable IPv6 addressâsome carriers support this, and some network configurations will work with it. But YMMV, and you should be prepared to deal with CG-NAT .
WARNING : If you set a Pi up as a webserver or some other type of server that's constantly using data, be carefulâyou could end up racking up huge overage charges if you're not careful.
Pi Setup
These modems are widely supported in Linux, and even in Raspberry Pi OS (which is based on Debian).
Since I used a SixFab SIM, I had to log into my SixFab account and set the SIM to be 'active' before it was able to connect to AT&T's network.
With the Raspberry Pi booted up, in a Terminal window, enter in
lsusb
and you should see something like:
pi@lte:~ $ lsusb
Bus 002 Device 001: ID 1d6b:0003 Linux Foundation 3.0 root hub
Bus 001 Device 003: ID 2c7c:0125 Quectel Wireless Solutions Co., Ltd. EC25 LTE modem
Bus 001 Device 002: ID 2109:3431 VIA Labs, Inc. Hub
Bus 001 Device 001: ID 1d6b:0002 Linux Foundation 2.0 root hub

pi@lte:~ $ lsusb -t
...
/:  Bus 01.Port 1: Dev 1, Class=root_hub, Driver=xhci_hcd/1p, 480M
    |__ Port 1: Dev 2, If 0, Class=Hub, Driver=hub/4p, 480M
        |__ Port 2: Dev 3, If 4, Class=Vendor Specific Class, Driver=qmi_wwan, 480M
If you don't see the modem listed in the output, you might not have plugged it in all the way, or your USB adapter or CM4 carrier board hasn't routed the USB signal properly (I've encountered a few broken implementations, so it's not out of the question).
If you check the kernel logs with
dmesg
, you may also see some messages from
qmi_wwan
, like:
pi@lte:~ $ dmesg | grep qmi
[    5.701450] qmi_wwan 1-1.2:1.4: cdc-wdm0: USB WDM device
[    5.703022] qmi_wwan 1-1.2:1.4 wwan0: register 'qmi_wwan' at usb-0000:01:00.0-1.2, WWAN/QMI device, 02:5c:84:4e:14:51
[    5.703245] usbcore: registered new interface driver qmi_wwan
And a device is listed as
cdc-wdm0
:
pi@lte:~ $ ls /dev/cdc*
/dev/cdc-wdm0
What may not be obviousâsince these 4G modems are physically in a mini PCIe card form factorâis that they don't show up as PCI Express devices (even on a Compute Module 4 board). They show up as USB devices.
Anyways, the card should automatically show up on as a
wwan
network interface, usually
wwan0
:
pi@lte:~ $ ip a
1: lo: <LOOPBACK,UP,LOWER_UP> mtu 65536 qdisc noqueue state UNKNOWN group default qlen 1000
...
3: wwan0: <BROADCAST,MULTICAST,UP,LOWER_UP> mtu 1500 qdisc pfifo_fast state UNKNOWN group default qlen 1000
    link/ether 02:5c:84:4e:14:51 brd ff:ff:ff:ff:ff:ff
    inet 169.254.231.106/16 brd 169.254.255.255 scope global noprefixroute wwan0
       valid_lft forever preferred_lft forever
    inet6 fe80::8284:d6cd:67d2:ca3a/64 scope link
       valid_lft forever preferred_lft forever
You can try using this interface already using
ping
, but since it's not configured yet, it most likely won't work:
pi@lte:~ $ ping -I wwan0 www.google.com -c 5
PING www.google.com (142.251.32.4) from 169.254.231.106 wwan0: 56(84) bytes of data.

--- www.google.com ping statistics ---
5 packets transmitted, 0 received, 100% packet loss, time 4085ms
At this point, you'll need to make a decisionâdo you want to use the device
QMI Mode setup (as
wwan0
)
There's a longer history about the relationship of QMI, MBIM, and PPP modes for these modems, which I don't know if I have time to get into here. But in general, you should use a modem like the Quectel I'm using in either QMI or ECM mode.
All the modems I've purchased seem to be in PPP/QMI mode by default (
usbmode
returns
0
âmore on that later). This seems to automatically make the device use the
qmi_wwan
driver and expose a
wwan0
interface.
SixFab has an excellent guide for getting started with this mode: Setting up a data connection over QMI interface using libqmi .
You need to install a few utilities to interact with the modem via QMI:
pi@lte:~ $ sudo apt update && sudo apt install libqmi-utils udhcpc
Then check the current operating mode for the modem:
pi@lte:~ $ sudo qmicli -d /dev/cdc-wdm0 --dms-get-operating-mode
[/dev/cdc-wdm0] Operating mode retrieved:
	Mode: 'online'
	HW restricted: 'no'
Note: If this returns a
Resource temporarily unavailableerror after a bit, you might need to first stop ModemManager (if it's installed and running) withsudo systemctl stop ModemManager, then try again.
If it doesn't return
online
, run
sudo qmicli -d /dev/cdc-wdm0 --dms-set-operating-mode='online'
to set it online.
Then set the interface into
raw_ip
mode:
pi@lte:~ $ sudo ip link set wwan0 down
pi@lte:~ $ echo 'Y' | sudo tee /sys/class/net/wwan0/qmi/raw_ip
Y
pi@lte:~ $ sudo ip link set wwan0 up
Confirm it's in the
raw-ip
mode with the following command:
pi@lte:~ $ sudo qmicli -d /dev/cdc-wdm0 --wda-get-data-format
[/dev/cdc-wdm0] Successfully got data format
                   QoS flow header: no
               Link layer protocol: 'raw-ip'
...
Now it's finally time to connect to the network your SIM card is affiliated with! You need to know the APN for the networkâin my case I'm using
super
for the SixFab card, but a common one for AT&T SIMs like the one I use in my iPhone is
nxtgenphone
. Cradlepoint maintains a list of common APNs by carrier , but to know what it should be, the easiest thing is to ask your provider.
Run the following command to connect:
pi@lte:~ $ sudo qmicli -p -d /dev/cdc-wdm0 --device-open-net='net-raw-ip|net-no-qos-header' --wds-start-network="apn='YOUR_APN',ip-type=4" --client-no-release-cid
[/dev/cdc-wdm0] Network started
	Packet data handle: '2267587312'
[/dev/cdc-wdm0] Client ID not released:
	Service: 'wds'
	    CID: '19'
Note: If you have a username and password, you can add those in after the apn, e.g.
apn='YOUR_APN',username='YOUR_USERNAME',password='YOUR_PASSWORD',ip-type=4.
Now, configure
udhcpc
to assign a default IP address and route:
pi@lte:~ $ sudo udhcpc -q -f -i wwan0
udhcpc: started, v1.30.1
No resolv.conf for interface wwan0.udhcpc
udhcpc: sending discover
udhcpc: sending select for 10.228.89.96
udhcpc: lease of 10.228.89.96 obtained, lease time 7200
At this point, if you use
ip a
, you should see the new settings for the modem:
pi@lte:~ $ ip a
...
3: wwan0: <POINTOPOINT,MULTICAST,NOARP,UP,LOWER_UP> mtu 1500 qdisc pfifo_fast state UNKNOWN group default qlen 1000
    link/none
    inet 10.228.89.96/26 scope global wwan0
       valid_lft forever preferred_lft forever
And, if everything worked correctly, you should see some successful pings:
pi@lte:~ $ ping -I wwan0 www.google.com -c 5
PING www.google.com (142.250.190.68) from 10.228.89.96 wwan0: 56(84) bytes of data.
64 bytes from ord37s34-in-f4.1e100.net (142.250.190.68): icmp_seq=1 ttl=116 time=50.2 ms
64 bytes from ord37s34-in-f4.1e100.net (142.250.190.68): icmp_seq=2 ttl=116 time=48.1 ms
64 bytes from ord37s34-in-f4.1e100.net (142.250.190.68): icmp_seq=3 ttl=116 time=46.3 ms
64 bytes from ord37s34-in-f4.1e100.net (142.250.190.68): icmp_seq=4 ttl=116 time=50.8 ms
64 bytes from ord37s34-in-f4.1e100.net (142.250.190.68): icmp_seq=5 ttl=116 time=74.4 ms

--- www.google.com ping statistics ---
5 packets transmitted, 5 received, 0% packet loss, time 4005ms
rtt min/avg/max/mdev = 46.260/53.975/74.403/10.342 ms
Yay! But once you restart the Pi, the network connection is lost.
After a reboot, you have to re-run the following commands to connect again:
pi@lte:~ $ sudo ip link set wwan0 down
pi@lte:~ $ echo 'Y' | sudo tee /sys/class/net/wwan0/qmi/raw_ip
pi@lte:~ $ sudo ip link set wwan0 up
pi@lte:~ $ sudo qmicli -p -d /dev/cdc-wdm0 --device-open-net='net-raw-ip|net-no-qos-header' --wds-start-network="apn='YOUR_APN',ip-type=4" --client-no-release-cid
pi@lte:~ $ sudo udhcpc -q -f -i wwan0
Even though
sudo qmicli -d /dev/cdc-wdm0 --wda-get-data-format
shows it's in
raw-ip
mode, it seems you still have to stop the interface, force
raw_ip
, and start the interface, then you can connect and set up the IP and routing with
udhcpc
.
Automatic re-connection
The simplest way to set up automatic re-connection is to add the following contents in a new file for the
wwan0
interface:
# Create the file.
pi@lte:~ $ sudo nano /etc/network/interfaces.d/wwan0

# Paste in the following contents (replacing with your own APN).
iface wwan0 inet manual
     pre-up ifconfig wwan0 down
     pre-up echo Y > /sys/class/net/wwan0/qmi/raw_ip
     pre-up for _ in $(seq 1 10); do /usr/bin/test -c /dev/cdc-wdm0 && break; /bin/sleep 1; done
     pre-up for _ in $(seq 1 10); do /usr/bin/qmicli -d /dev/cdc-wdm0 --nas-get-signal-strength && break; /bin/sleep 1; done
     pre-up sudo qmicli -p -d /dev/cdc-wdm0 --device-open-net='net-raw-ip|net-no-qos-header' --wds-start-network="apn='nxtgenphone',ip-type=4" --client-no-release-cid
     pre-up udhcpc -i wwan0
     post-down /usr/bin/qmi-network /dev/cdc-wdm0 stop
Note: Be sure to include username and password as stated earlier, if your SIM plan requires it.
Reboot (
sudo reboot
) and once rebooted, run the following to manage the connection:
# Bring up the connection.
pi@lte:~ $ sudo ifup wwan0

# Bring down the connection.
pi@lte:~ $ sudo ifdown wwan0
And check if there's a route to the internet via
wwan0
with
route -n
(or try a ping through the interface).
If you want the interface to come up at system boot, add the line
auto wwan0
above the
iface
line in the
/etc/network/interfaces.d/wwan0
file:
auto wwan0
iface wwan0 inet manual
Now after a reboot, the interface should come up automatically, instead of requiring a manual
sudo ifup wwan0
.
Other helpful QMI modem commands
sudo qmicli -d /dev/cdc-wdm0 --nas-get-signal-info
sudo qmicli -d /dev/cdc-wdm0 --nas-get-signal-strength
sudo qmicli -d /dev/cdc-wdm0 --nas-get-home-network
sudo qmicli -d /dev/cdc-wdm0 --nas-get-serving-system
sudo qmi-network /dev/cdc-wdm0 status
sudo qmicli -d /dev/cdc-wdm0  --wds-get-packet-service-status
ECM mode setup (
usb0
)
SixFab has a great guide for setting the modem into ECM mode , which exposes a
usb0
network interface instead of a
wwan0
interface.
Assuming you did all the QMI mode setup, first make sure the interface is down with
sudo ifdown wwan0
. Also comment out all the lines in
/etc/network/interfaces.d/wwan0
(or delete that file).
To switch to ECM mode, you need to use
minicom
to communicate with the modem over it's serial port:
pi@lte:~ $ sudo apt install minicom -y
pi@lte:~ $ minicom -D /dev/ttyUSB2 -b 115200
This should open a serial connection. Type in
AT
and press 'Enter', and you should see
OK
. We're gonna talk old school AT commands to the modem, the first one being the command to check the current
usbmode
:
AT+QCFG="usbnet"
That will likely return
+QCFG: "usbnet",0
, but we need that to be set to
1
(ECM mode), so enter the following command:
AT+QCFG="usbnet",1
The modem may reboot itself automatically, but if not, enter the following command to force a reboot:
AT+CFUN=1,1
See, it's fun!
After 5 seconds or so, you'll see a warning pop up in minicom like
Cannot open /dev/ttyUSB2!
. It will go away, and you'll start seeing some more information go by as the modem completes its boot process.
Once you can type
AT
again and get
OK
, it's time to make sure the APN is correct. Enter the following command (but make sure you put in the correct APN for your SIM...):
AT+CGDCONT=1,"IP","YOUR_APN"
And finally, restart the modem again:
AT+CFUN=1,1
Wait for the modem to reboot, then exit minicom: press Ctrl-A, then press Z, and minicom's help comes up. Press X to leave minicom and confirm you want to leave it by hitting Enter.
Now reboot the Raspberry Pi (
sudo reboot
), then check if you got an IP address on the
usb0
interface:
pi@lte:~ $ ifconfig usb0
usb0: flags=4163<UP,BROADCAST,RUNNING,MULTICAST>  mtu 1500
        inet 192.168.225.24  netmask 255.255.255.0  broadcast 192.168.225.255
        inet6 fe80::1f80:5523:108c:a9eb  prefixlen 64  scopeid 0x20<link>
        ether a6:51:1c:3f:79:1c  txqueuelen 1000  (Ethernet)
        RX packets 24  bytes 2153 (2.1 KiB)
        RX errors 0  dropped 0  overruns 0  frame 0
        TX packets 33  bytes 4162 (4.0 KiB)
        TX errors 0  dropped 0 overruns 0  carrier 0  collisions 0
And confirm the modem is using the
cdc_ether
driver instead of
qmi_wwan
:
pi@lte:~ $ lsusb
...
Bus 001 Device 003: ID 2c7c:0125 Quectel Wireless Solutions Co., Ltd. EC25 LTE modem

pi@lte:~ $ lsusb -t
...
/:  Bus 01.Port 1: Dev 1, Class=root_hub, Driver=xhci_hcd/1p, 480M
    |__ Port 1: Dev 2, If 0, Class=Hub, Driver=hub/4p, 480M
        |__ Port 2: Dev 3, If 4, Class=Communications, Driver=cdc_ether, 480M
        |__ Port 2: Dev 3, If 5, Class=CDC Data, Driver=cdc_ether, 480M
Test if you can reach the Internet through the
usb0
interface:
pi@lte:~ $ ping -I usb0 www.google.com -c 5
PING www.google.com (142.250.190.68) from 192.168.225.24 usb0: 56(84) bytes of data.
64 bytes from ord37s34-in-f4.1e100.net (142.250.190.68): icmp_seq=1 ttl=115 time=33.9 ms
64 bytes from ord37s34-in-f4.1e100.net (142.250.190.68): icmp_seq=2 ttl=115 time=36.8 ms
64 bytes from ord37s34-in-f4.1e100.net (142.250.190.68): icmp_seq=3 ttl=115 time=41.8 ms
64 bytes from ord37s34-in-f4.1e100.net (142.250.190.68): icmp_seq=4 ttl=115 time=59.9 ms
64 bytes from ord37s34-in-f4.1e100.net (142.250.190.68): icmp_seq=5 ttl=115 time=39.1 ms

--- www.google.com ping statistics ---
5 packets transmitted, 5 received, 0% packet loss, time 4005ms
rtt min/avg/max/mdev = 33.934/42.293/59.880/9.168 ms
Hooray! The best thing about this setup is it seems to come up automatically after a reboot on its ownâno need for any network interface or
qmicli
shenanigans.
You can still disable the
usb0
interface with:
pi@lte:~ $ sudo ip link set usb0 down
Other Useful AT commands
# Signal strength: https://m2msupport.net/m2msupport/atcsq-signal-quality/
AT+CSQ
+CSQ: 20,99

# Network information: https://m2msupport.net/m2msupport/network-information-automaticmanual-selection/
AT+COPS?
+COPS: 0,0,"AT&T Twilio",7

# Get clock: https://m2msupport.net/m2msupport/m2m-module-diagnostics/
AT+CCLK?
+CCLK: "22/01/20,19:28:12-24"
Built-in AP configuration
It seems another side effect of using the
usb0
interface is the modem itself is where all the management happens, and at least on my Quectel modem, if you open up the gateway IP address in a router (e.g.
https://192.168.225.1/
), bypassing certificate warnings, you end up with a little 'Qualcomm MobileAP' login page like:
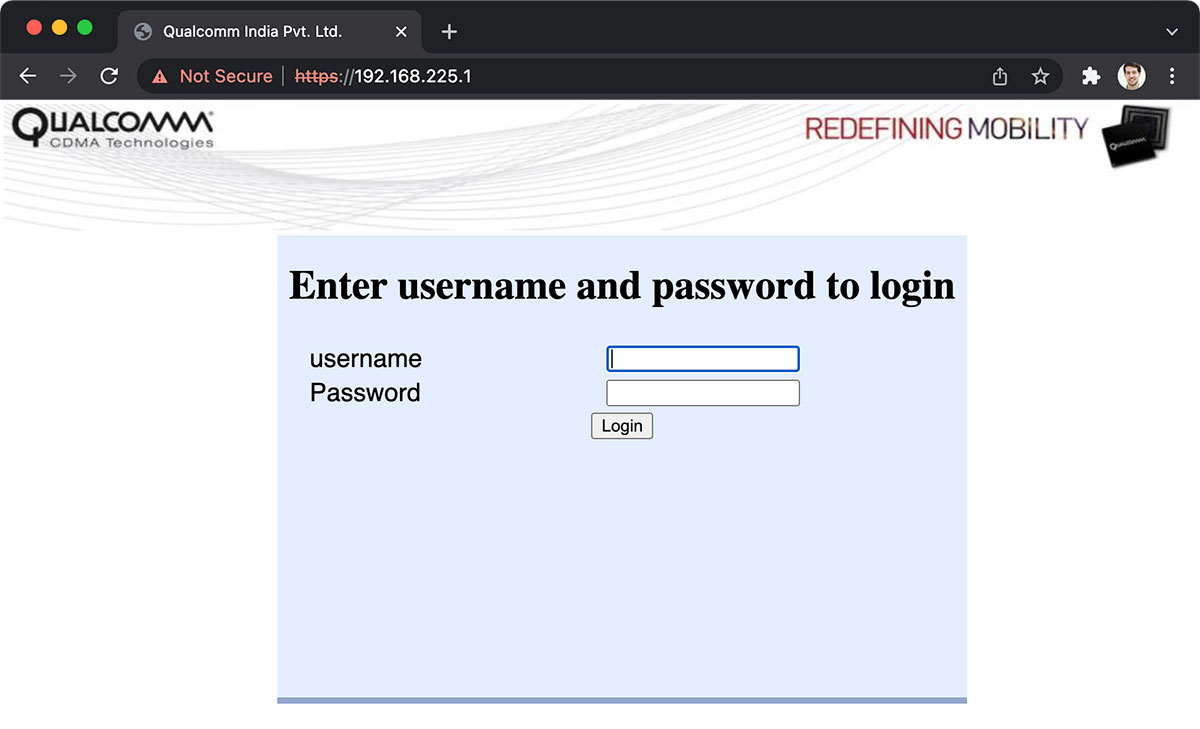
Note: Since I was operating the Pi headless, and browsing pages via
curlis all but impossible, I accessed the site from my Mac using an SSH tunnel (ssh -D 8080 [email protected]), then I configured my network to use a SOCKS5 proxy with addresslocalhostand port8080). Then I could access the IP address of the modem in my Mac's browser (Chrome, in this case).
The UI looks ancient (and like many ancient designs, is likely vulnerable to many kinds of attacks ), but it did seem to have a number of settings like a built-in firewall, some DHCP options, and basic WWAN settings:
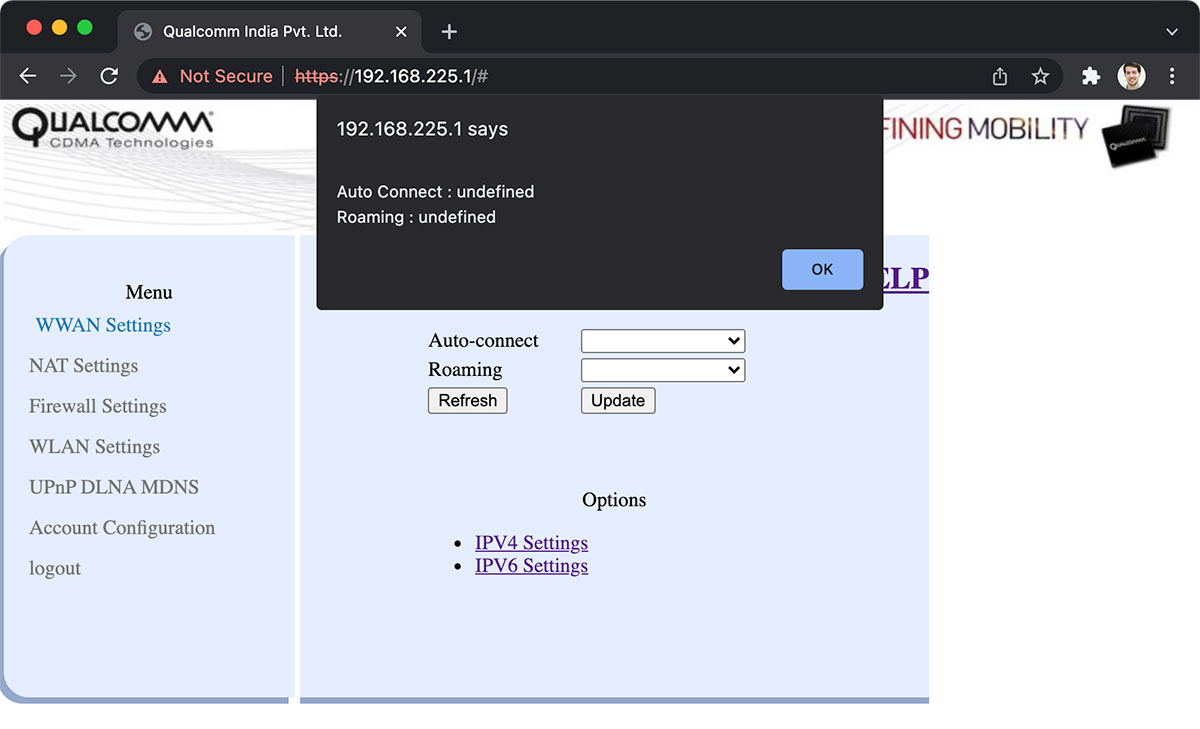
It's not a very intuitive UI, thoughâand I also didn't see any easy way to do a 'factory reset' or to upgrade the modem from within the MobileAP interface. Seeing the copyright of 2014 didn't inspire a whole lot of confidence there :P
Updating Firmware
But speaking of the modem's firmware, there has to be a way it can be updated, right? Well... there is , with a tool called QFlash, which I found in the 'Tools' section of the EC25 page on SixFab's website.
But it references firmware files that are seemingly conjured up out of thin air, as if by magic.
The only firmware files I could find available for download were through random Google Drive links on forum postings or expired WeTransfer links . Yeah, like I'm gonna do that!
And if you search Quectel's forums, you'll find threads like this one , which seemingly never get resolved:
Quectel Rep: If you need the latest firmware, you can send email to [email protected] to get it, you can provide the firmware you used now, then we will arrange local FAE to support you, they will help to provide the latest firmware package, the upgrade tool and guide you how to upgrade it. Thanks!
Customer: I tried again to request firmware from support earlier this week. Any idea what sort of time I should expect for a typical firmware request?
Quectel Rep: Please provide your email and company name, your country to us, we will arrange local FAE to support you as soon as possible.
Customer: [after doing this loop a few times] ... ð
So yeah... not sure why it's not possible for Quectel to just provide a firmware download page. And it looks like this isn't the first time someone's hit a brick wall communicating with Quectel; I found Harald Welte's OSMOCOM presentation suggesting it was difficult getting Quectel to provide the sources for their on-chip Linux build.
Choosing QMI or ECM
When I started out on my journey towards understanding 4G LTE on a Pi, I was quickly confused by the fact that almost every tutorial and setup guide had completely different instructionsâand some where basically copy-and-paste of someone else's guide.
But nobody seemed to ever talk about the different connection methods: why do multiple methods exist? Why do modems (at least the Quectel) come with QMI and
wwan0
set up by default? Is one method faster and/or better supported than another?
Don't know.
So I did a bit of testing in this GitHub issue , and found (informally, at least) that I could get consistently better latency and upload speeds with the ECM driver (
cdc_ether
).
What's more, that driver (which sets up the
usb0
interface) seems to work out of the box with everything in Linux, doesn't require me to set up a custom interface file with a bunch of extra commands, and is set up automatically just like any other network interface.
Am I missing something? Is there any upside to using the default QMI /
qmi_wwan
/
wwan0
?
I asked about it on Twitter and will update this post if I find anything conclusive.
Selecting the default interface for Internet access
With an active 4G LTE interface (whether
wwan0
or
usb0
), there could be a new problem: what if you have two interfaces providing Internet connectivity? For example, what if your Pi also has a WiFi or Ethernet connection that has more stable or faster Internet, and you just want to use the LTE connection as a backup?
I won't get too deep in the weeds, but you can see how Linux will prioritize routing of the Internet connection by running
route
:
pi@lte:~ $ route
Kernel IP routing table
Destination     Gateway         Genmask         Flags Metric Ref    Use Iface
default         mobileap.qualco 0.0.0.0         UG    204    0        0 usb0
default         10.0.100.1      0.0.0.0         UG    303    0        0 wlan0
10.0.100.0      0.0.0.0         255.255.255.0   U     303    0        0 wlan0
192.168.225.0   0.0.0.0         255.255.255.0   U     204    0        0 usb0
I actually wrote up an entire blog post on how to change the
metric
, so Linux will route through a different interface. Check out that post for all the details: Network interface routing priority on a Raspberry Pi .
But for the tl;dr: Linux will route packets through whichever interface has the lowest
Metric
(which in the case above is
usb0
) and matches the
Gateway
IP range (
0.0.0.0
means 'any IP address', basically).
So check out the linked blog post if you need to manage the Metric priority for different devices.
One case where that solution isn't so helpful is with the modem in QMI mode (
wwan0
). Since that's using
udhcpc
instead of the system's built-in
dhcpcd
, setting the metric is not as straightforward as I hoped.
Based on the udhcpc documentation , I thought I could just add a file
/etc/udhcpc/udhcpc.conf
and put
IF_METRIC=400
inside, and that would be picked up as the routing metric... but that didn't seem to work. More investigation is needed.
Conclusion
I naïvely thought, coming into this project, that 4G LTE connectivity would be rather simple. But it's not. And it seems like there are basically two layers of documentation:
- Datasheets and code comments that expect expert-level understanding already.
- Beginner-level guides like "how to get your Pi connected to the Internet"
Hopefully some of what I wrote here can bridge the gap between those two levelsâbut I gotta be honest, I typically don't like writing a blog post when I only have a partial understanding of the subject... and that's what I have here. So take what I say about 4G LTE with a grain of salt ;)