Valve's Steam Deck runs SteamOS out of the box, which is based on Arch Linux. It allows for a simplified, almost console-style experience that's easily navigated with the handheld's controllers.
Despite Valve's efforts, not every game runs smoothly on the Deck yet. Some games designed for Windows don't yet play well with Steam's Proton emulation layer for Linux. Additionally, SteamOS also doesn't support non-Steam games, like those from the Epic Games Store.
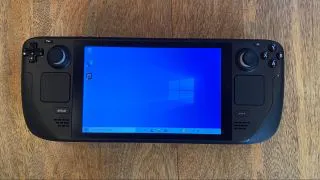
But the Steam Deck is a PC, which means that there's nothing stopping you from installing alternative operating systems. If you want to run your Steam games and also play those from other stores, Windows may be your best option. Additionally, installing Windows means that you won't have any Proton compatibility issues for Windows-native games. Those games should be just as compatible as they are on the best gaming PCs , albeit with the Steam Deck's limited specs in mind. Additionally, using Windows means that if you're a subscriber to Xbox Game Pass, you'll be able to play games from that service on the Steam Deck.
There are trade-offs, however. The OS will be harder to navigate without a keyboard and mouse, and features like suspending games are built into SteamOS and won't work on Windows.
But before we get started, note that you probably shouldn't do this just yet. The Windows drivers for Steam Deck aren't finalized, so you may not get optimal performance, and you'll need an Ethernet to USB-C adapter to get internet access. The speakers, as of this writing, also don't work on Windows. Unless you really need Windows for something, you should probably wait until that's available.
Secondly, we'll be running this tutorial with Windows 10. Windows 11 requires a firmware TPM which, as of this writing, isn't implemented in the Steam Deck's BIOS. That will come in an upcoming update, Valve's Lawrence Yang told me, and the steps for installing the newer OS should largely be the same.
But hey, it's your PC, and those drivers should eventually show up. But until they do (and until Valve has published a way to restore your Steam Deck to SteamOS), you may want to hold off.
We'll be detailing two ways to run Windows on the Steam Deck. The first installs to the internal SSD, while the second runs Windows off of a microSD card. The former is likely to be faster, but the latter is more reversible until Steam provides documentation on how to dual boot.
With all of those caveats, here's how to install Windows on a Steam Deck:
Method 1: Install Windows to the Steam Deck’s SSD
Be careful doing it this way. At the moment, Windows isn't in the best working state, and there isn't yet a public recovery image for Steam Deck owners to use to revert back to SteamOS (though I'm told this is coming.)
1. Create a Windows 10 or 11 installation drive .
To get started, you'll need to make a Windows installer on a USB drive. Go here to create one for the version of Windows you want to install. This is easiest to do from a separate, Windows-based PC. Follow the instructions to create the installation media.
2. With the power off, plug the USB drive into the Steam Deck .
If you have a USB Type-C flash drive, you can plug it directly into the port on the Steam Deck. If not, you'll need a USB-C hub to do so.

3. Hold the Volume Down button and power on the system to access the boot menu.
If you're using the Steam Deck's controls, use the D-Pad to move to the "EFU USB Device," then press A to select it.
4. The Steam Deck will boot up.
5. The Windows installer will start. Yes, it is sideways.
If you're using a USB-C hub, you may want to plug in a keyboard and mouse. The Steam Deck's controls won't do anything here. That being said, if you don't have a keyboard and mouse, the touchscreen will continue to work.
6. Choose your language and click or tap "Next."
7. Click or tap "Install Now."
8. Activate Windows. If you have a product key, you'll be asked to enter it there. There is a touchscreen keyboard if you need it. If you don't have a key, choose "I don't have a product key."
9. Choose your version of Windows , then click or tap "Next."
Here, we used Windows 10 Home.
10. Agree to the terms and conditions to continue. Check the box and click or tap "Next. " That is, assuming you agree. If you don't, stop now and return to SteamOS.
11. Choose a Custom Windows Install. Upgrade installs only work on computers that already have a version of Windows.
12. Delete partitions to make space for Windows.
When you go to install Windows, you'll notice that the SSD is split into eight partitions, and you can't install Windows onto any of them. You will have to remove partitions to install Windows. We deleted partition 8, which was the largest of them.
If you are uncomfortable deleting the partitions on your SSD, you may want to consider installing Windows on an SD card and booting from there, or even sticking with SteamOS. You can still back out at this point without deleting any data.
13. Select "Drive 0 Unallocated Space" and tap or click "Next."
14. Windows will begin to install.
15 . The Steam Deck will reset.
You may see the screen orientation change a few times.
16. Follow the Windows setup process. The instructions are all on-screen. You could use a keyboard and mouse or the touchscreen again. Here, the D-Pad up and down arrows work, as does the A button, but the screen is still sideways.
If you want to connect to the internet, you'll need an Ethernet to USB cable. As of this writing, Windows on the Steam Deck doesn't have working Wi-Fi drivers.
17. The Windows desktop will appear. Note that it is still sideways. We'll fix this shortly.
Because Windows drivers aren't finalized, we got an error that read "Searching for Display Driver: Screen, resolution, performance and battery life may be reduced until a compatible driver has finished installing."
18. Go to Start > Settings > System > Display
19. Scroll down to Display Orientation and choose "Landscape" to orient the screen in the right direction.
Now, you have Windows 10 installed on your Steam Deck. As of publication, there's still plenty to be fixed. The speakers don't work, nor does Wi-Fi. The graphics driver that will ensure best performance isn't there yet. Additionally, Valve has yet to publish a way to revert back to SteamOS, though we understand that should occur soon.
Another Method: Boot Windows from a microSD card or USB Drive
Note: We're using a microSD card here, but the steps should be the same for a USB stick.
To get started, you'll need a Windows ISO. Go here to download the media creator. This is easiest to do from a separate, Windows-based PC. Follow the instructions to create the ISO.
Next, you'll need software to make your microSD card into a bootable drive. We'll be using Rufus , which is free, but if you're familiar with another piece of software, you can do it that way.
2. Open Rufus
3. Select your microSD card and Windows ISO
4. Under Image Option , choose "Windows to Go."
5 . Under partition scheme , pick MBR. In advanced options, check "Use Rufus MBR with BIOS ID"
6 . Click "Start." Now you wait. This may take a bit.
7. Eject your SD card from your PC and put it in the Steam Deck
8. With the Steam Deck turned off, hold Volume Down and press the power button .
9. Select the SD Card in the boot manager. The D-Pad works to pick a drive, and you can select it with the A button.
10. Windows will start to boot. (Yes, it will be sideways. This is normal.)
11 . Proceed with Windows setup . You may want to use a keyboard and mouse here, though you can get through the whole thing with the touch screen.
You'll end up on the Windows desktop. It will still be sideways.
Because Windows drivers aren't finalized, we got an error that read "Searching for Display Driver: Screen, resolution, performance and battery life may be reduced until a compatible driver has finished installing."
12. Go to Start > Settings > System > Display
13 . Scroll down to Display Orientation and choose "Landscape" to orient the screen in the right direction.
Because Windows is on the microSD card, when you reboot your Steam Deck, you'll return to Steam OS on the SSD. If you want to return to Windows, you'll have to enter the boot manager (Volume Down + Power) and select the SD card.
Because Windows drivers aren't finalized on Steam Deck, you may have performance issues. Additionally, the speakers don't yet work and you'll need a dongle for Wi-Fi or to connect to an Ethernet cable.