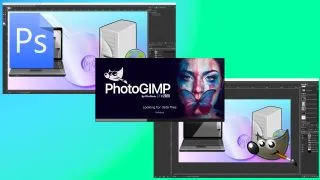
Adobe Photoshop is the de facto standard for image editing, but it doesn’t come cheap. The basic consumer version, Photoshop Elements, costs around $100 and a subscription that runs professional-grade Photoshop starts at $19.99 a month. Unless you really need the features of genuine Photoshop, there’s a powerful, free alternative in GIMP (The GNU Image Manipulation Program), which is available for Windows, Linux and macOS.

The first hurdle when moving from Photoshop to GIMP is the user interface. GIMP is very different from Photoshop and that can slow your workflow to a crawl. Keyboard shortcuts and menu layout changes can infuriate users. If you have the time and the patience, learning the GIMP user interface isn’t too difficult, but for some folks, it just isn’t as user-friendly as Photoshop’s.
The GIMP community comes to the rescue and Diolinux’s PhotoGIMP is a complete user interface replacement for GIMP which uses Photoshop as a template. Not only does it replace the UI, but it adds Photoshop shortcuts, icons and Python image filters.
In this how to, we will learn how to install PhotoGIMP on top of the latest version of GIMP.
1. Download the source code zip file and extract the contents to a folder.
2. Open the folder and navigate to the \PhotoGIMP-1.1\.var\app\org.gimp.GIMP\config\GIMP folder. You will see a folder, 2.10 that contains the PhotoGIMP configuration files that will turn GIMP into a Photoshop facsimile.

3. Open a new File Manager window and navigate to C:\Users\YourUserName\AppData\Roaming\GIMP\ a hidden folder where GIMP stores its configuration files. Make sure to change YourUserName to your own.
4. Copy the folder and store it safely in another folder on your drive. This folder contains the configuration files for stock GIMP. We can use a backup of this folder to restore GIMP to stock.
5. Copy the folder, 2.10 from the downloaded archive folder, into your GIMP configuration folder. When prompted to replace files select yes.
6. Open GIMP. The new configuration files will be loaded, and you will see a new PhotoGIMP splash screen.
The PhotoGIMP Layout
The GIMP layout is now replaced with a facsimile of Adobe Photoshop.
The layout is broken down into four main sections.
1. Document tab: Here is where compositions are created.
2. Palettes: These palettes alter as we use tools.
3. Tools: The toolbox contains all of the tools an artist may need. Some icons, with a small triangle in the bottom right corner have extra tools hidden within. Right click on the icon to open the menu.
4. Layers and Channels: Here we can see all of the layers that make up a composition.