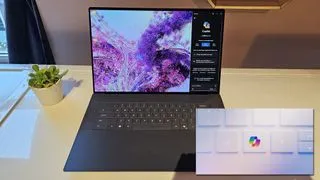
In January, Microsoft announced that it was working with OEMs to add a Copilot key to PC keyboards. And, during CES, we saw OEMs like Dell and Lenovo showing off laptops with the new key to the right of the spacebar, where a menu key might appear. When pressed, the Copilot key does something very simple: it opens Windows Copilot, which appears in Windows 11 or 10 as a sidebar where you can chat with Microsoft's AI (assuming you have Copilot installed as it is on most of the latest builds of Windows 11).
Fortunately, if you want a Copilot key, you don't need a new laptop or even a new keyboard. All you need to do is write a really simple keyboard macro and assign it to a key you don't want to use for anything else. If your keyboard has a menu key, you can reassign the macro to that. If it doesn't have a menu key, you can always remap the right Alt or right CTRL key, which a lot of people never use.
Now, to be fair, you don't need a dedicated Copilot key at all. Hitting Windows Key + C is a pretty easy keyboard shortcut that launches it. Or you could just click the Copilot icon in the taskbar. But if you want a dedicated Copilot key, here's how to get one on your current PC.
How to Add a Copilot Key to Windows
What we're going to do is assign the Windows Key + C sequence to a single key. There are many ways to remap a key or set up a macro, but we like using AutoHotkey, an open-source macro scripting language.
1. Download and install AutoHotkey 2 if you don't have it running already.
2. Set up a text editor to work with AutoHotkey 2. I like using Notepad++ , which has the correct syntax highlighting if you follow these instructions . There's also an editor called SciTE4AutoHotkey that has all the autocompletes and syntax highlighting for AHK built-in.
3. Put this text at the top of a blank file.
#Requires AutoHotkey >=2.0
#SingleInstance force
4. Choose the key you wish to remap into a Copilot key. Take note of its AutoHotkey name as shown in the table below.
| Key Name | AutoHotkey Code Name |
|---|---|
| Menu Key | AppsKey |
| Right Alt | RAlt |
| Right Ctrl | RControl |
| Right Windows Key | RWin |
5. Enter the following code, changing "AppsKey" to a different code name if you wish to map a key other than the menu key.
AppsKey::
{
Send "#c"
}
The complete text of your script should look like this:
#Requires AutoHotkey >=2.0
#SingleInstance force

AppsKey::
{
Send "#c"
}
6. Save the script to your Windows startup folder at C:\Users\[YOUR USERNAME]\AppData\Roaming\ Microsoft \Windows\Start Menu\Programs\Startup where [USERNAME] is your Windows username. This will insure that the script runs every time Windows boots. Give your file a name that ends in .ahk (ex: myscript.ahk).
7. Test your script to make sure it works.
Now you'll be able to launch Copilot by hitting the key you chose. However, that key will no longer work for its original purpose, so make sure you're happy giving it up. And remember, you can always get Copilot without a Copilot key.