
Earlier this year, we took a look at the Tryx Panorama 360 AIO , and my conclusion was that it was one of the strongest and most unique liquid coolers on the market, having a one-of-a-kind screen and integrated VRM fan – but I found it flawed due to unusually high minimum noise levels.
Today I have the 240mm version of this AIO on hand, and my conclusion about this product is basically the same as the 360mm version. So rather than rehash the same points over again, we’ll mostly focus on how much – or little – is gained from cooling Intel’s Core Ultra 7 265K with a high-end AIO liquid cooler.
We’ll start by going over the features of the cooler, and then we’ll quickly dive into the thermal benchmarks with Intel’s Core Ultra 7 265K.
Cooler specifications
| Cooler | Tryx Panorama 240 |
| MSRP | $309.99 USD |
| Heatsink Material | Aluminum |
| Lighting | Display on CPU block ARGB lighting for fans |
| Warranty | Cooler : 6 years Display: 2 years |
| Socket Compatibility | Intel Socket LGA 1851/1700/1200/115x AMD AM5 / AM4 |
| Pump Speed | 800-2600RPM ±10% |
| Radiator Size | 279.5 (L) x 120 (W) x 30 (D) |
| Base | Copper |
| Average Maximum TDP (Our Testing) | >260W with Intel’s Core Ultra 7 265K |
Packing and included contents
The outside of the box advertises the unit with a striking black and white design.

The contents are well-protected with thick molded foam lining the package and the individual contents covered by plastic and/or cardboard.

Included with the box are the following
- Pre-installed 120mm fans
- 240mm radiator
- Wrap-around AMOLED display
- Pre-installed a-01 thermal paste
- 2g tube of a-01 thermal paste
- Mounting for modern AMD and Intel platforms

The good parts about the Tryx Panorama 240
👍 Pre-installed 240mm fans
There’s more to a cooler than just the heatsink or radiator. The bundled fans have a significant impact on cooling and noise levels, as well as how the cooler looks in your case.

The ROTA ARGB fans included with the Tryx Panorama have been pre-installed for easier intallation.
| Dimensions | 120 x 120 x 25mm |
| Fan Speed | Up to 500-1850 RPM ±10% |
| Air Flow | Up to 66.09 CFM |
| Air Pressure | Up to 1.88 mmAq |
| Bearing Type | FDB |
| Lighting | ARGB |

👍 Market-leading thermal performance
I can’t overemphasize how strong the Tryx Panorama AIOs are - in terms of thermal performance, you honestly won’t find anything better on the market, as I demonstrated in the review of the Tryx Panorama 360 .

👍 Large copper contact plate with pre-applied thermal paste
The Panorama AIOs feature a large copper CPU contact plate, with A-01 thermal paste pre-installed for ease of use.

👍 2g tube of A-01 thermal paste
In addition to the pre-installed thermal paste applied to the CPU block, Tryx also includes a tube of A-01 thermal paste for use in additional installations.

👍 Eye-catching wrap-around 6.5-inch Anamorphic 3D AMOLED display
There’s one thing that immediately distinguishes this AIO from its competition, and that’s its one-of-a-kind 6.5-inch, 2240x1080 resolution 60hz AMOLED display. This seems to be the biggest display of any AIO on the market, and it’s definitely the most eye-catching.

In all honesty, to describe this display as merely “eye-catching” is a bit of an understatement. The default pre-loaded visual options cleverly utilize the “true black” panel and curvature of the display to create a striking anamorphic 3D effect.
Included below is a clip demonstrating it in action, but this is one of those things you have to see in real life to understand just how striking it is, as it doesn’t totally translate to a 2D video.
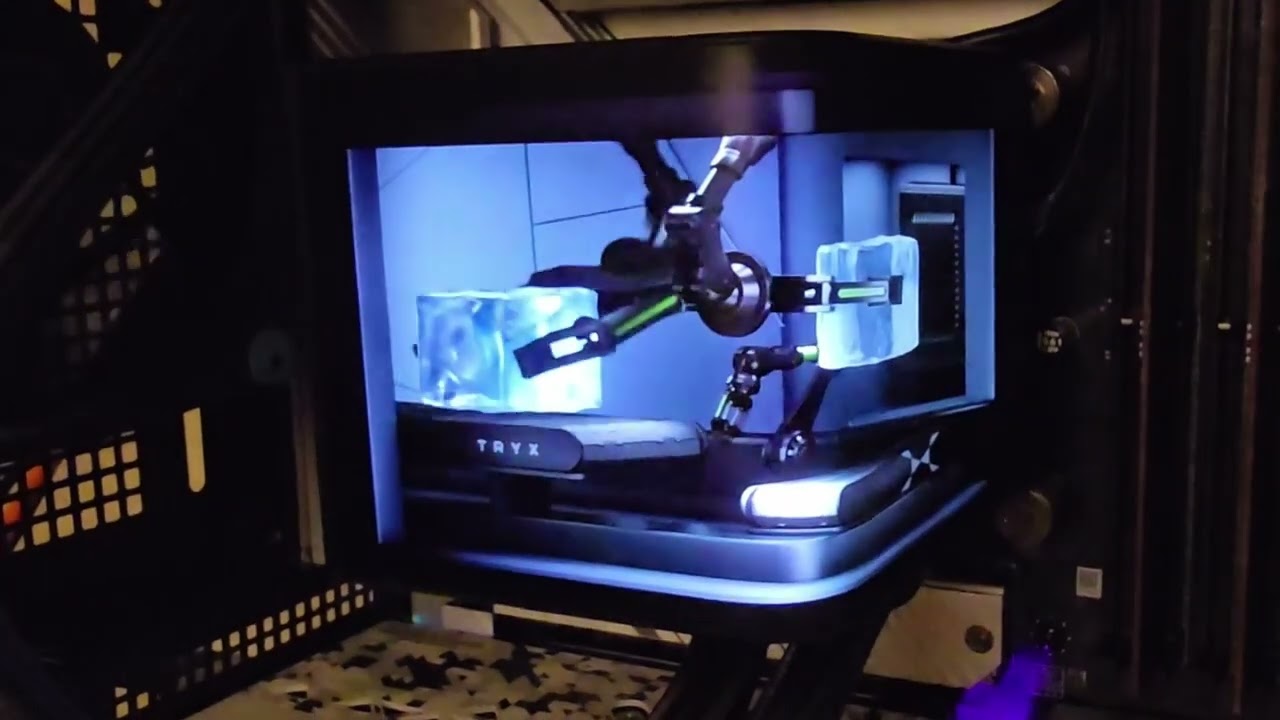
To control the display, you’ll need to download Tryx’s Kanali software. You can set the screen to display a variety of pre-loaded anamorphic 3D animations, or upload your own media. Various system statistics information of your choosing can be displayed, as shown in the product demo above.

Tryx also includes a handy video guide demonstrating the features and how to use the Kanali software, which you can check out here .
👍 Integrated VRM fan
Underneath the curved display included on the Tryx Panorama AIOs is an effective VRM fan to help sustain maximum performance.

👍 Full RAM Compatibility
As with most other AIO Liquid Coolers, the Tryx Panorama does not interfere or overhang DIMM slots – ensuring compatibility with any size of RAM, no matter how tall.
The bad parts about the Tryx Panorama 240
👎 High minimum noise levels
The biggest flaw of the Panorama AIOs is that they have a very high minimum noise level of around 42 dBA from the unit’s pump. On both the 240mm and 360mm version of this cooler, no amount of adjusting settings or tweaking was able to reduce the noise levels. Some users will consider this a fatal, deal-breaking flaw – but those who don’t mind higher noise levels probably won’t care.

I’ve included some of the noise measurements from the Tryx Panorama 240 AIO above. If you’re interested in an in-depth look at the noise levels of the Panorama coolers, please refer to our review of the 360mm model.
👎 Luxury Price Tag
Another downside of the Tryx Panorama AIOs is that they’re among the most expensive on the market. The 360mm version runs $349.99 USD. The 240mm can be found for slightly less, at $309.99 USD. It goes without saying that you can definitely find better value coolers – I particularly recommend Iceberg Thermal’s IceFLOE AIOs or ID-Cooling’s FX360 INF for those looking for a low-cost but effective AIO liquid cooler. These models also have much quieter noise levels.
Testing configuration – Intel LGA1851 platform
| CPU | Intel Core Ultra 7 265K |
| Motherboard | MSI Z890 Carbon Wifi |
| Case | MSI Velox 100R |
| GPU | MSI Ventus 3x RTX 4070Ti Super |
| PSU | MSI MEG AI1300P |
LGA 1700 Installation
1. I would start by securing the radiator and fans to your computer case, but this step can be done at the end if you prefer.
2. Place the CPU bracket against the rear of the motherboard. Secure it using the included standoffs.

3. Take the CPU block, which has pre-installed thermal paste, and place it on top of the CPU. Secure it with the included screws.

4. Place the screen on top of the VRM fan.

5. Connect the cables to the corresponding headers on your motherboard, and installation is complete.