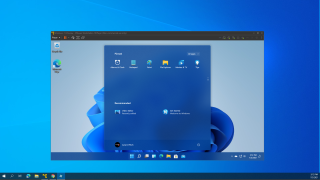
If you want to try Windows 11 on your PC, but don't want to risk replacing a stable version of Windows 10 with a beta operating system that could have bugs, you can use a virtual machine. Virtual machines allow you to simulate a PC but run it in a window on top of your main OS.
Below, we'll explain how to install Windows 11 in a virtual machine, step-by-step. The good news is that the VM software we recommend for this task, VMWare Workstation Player, is free. However, you will need a separate, valid Windows 10 key for the VM that you are not using on the host PC or elsewhere. If you don't have one, see our story on how to get Windows 10 for cheap , where we recommend some key merchants you can use.
You host computer should also have at least 8GB of RAM and a quad-core CPU, because the VM will need to use at least two cores and 4GB of RAM.
How to Install Windows 11 on Virtual Machine
1. Download and install VMware Workstation Player . It's a free download for non-commercial use. We also attempted this with Oracle VirtualBox and it did not work.
2. Create a Windows 10 ISO file if you don't have one already. You can do this by using the Windows Media Creation tool and choosing ISO file as the output. Make sure you select the version of Windows (Home, Pro, etc) you have a product key for.
3. Select New Virtual Machine from the Player->File menu in VMWare Workstation Player.

4. Select the location of your Windows 10 ISO file when prompted and click Next .

5. Name your virtual machine anything you want and click Next .

6. Set the Maximum disk size to at least 64GB and choose "Store virtual disk to one file." Then click Next .

7. Click Customize Hardware .

8. Increase the RAM to at least 4GB (4096MB), preferably 8GB. Click Close .

9. Click Finish and make sure "Power on this virtual machine..." is checked .

10. Press a key to boot off of the ISO, which the VM thinks is a DVD. If you're not fast enough, you can select Power->Restart from the Player menu.

11. Follow the prompts to install Windows 10. Be sure to enter your product key and Select Custom Install when prompted to choose between Custom and Upgrade.
You'll have to wait a few minutes for the install to complete, of course. Also, make sure you use a Microsoft Account.

12. Click Install Tools and then install the VMWare graphics driver from the virtual optical drive.

13. Join the Windows Insider Program on the virtual machine. To do that, Navigate to Settings->Update & Security->Windows Insider Program and click Get started.

14. Select the Dev Channel and click Confirm . Follow the prompts to confirm again and restart your virtual machine.

15. Click Check for Updates under Settings->Update & Security->Windows Update.

Windows 11 Insider Preview should start downloading and installing. It could take quite a while, depending on your download speed.

16. Reboot your PC when prompted.